 Anacortes Siding
 Building New in Edison Means Building for the Weather You Already Know
If you're framing a new home or outbuilding in the Edison area, you already know what the weather does out here. The open farmland and tidal water around Edison don't offer much of a windbreak, so wind-driven rain hits walls harder and more often than it does further inland. Add in salt-laden air moving off the bay and a moss season that can run eight or nine months out of the year, and you've got a climate that is genuinely tougher on window assemblies than most manufacturers' warranty language assumes. New construction is the one chance to get this right from the studs out, before siding, trim, and finishes make corrections expensive.
We install windows across Skagit County and Fidalgo Island, and Edison jobs tend to share a few things: open exposure with few mature trees to break the wind, proximity to salt water, and clients who are building once and want it done right rather than redone in ten years.
Why New-Construction Windows Are a Different Job Than Replacements
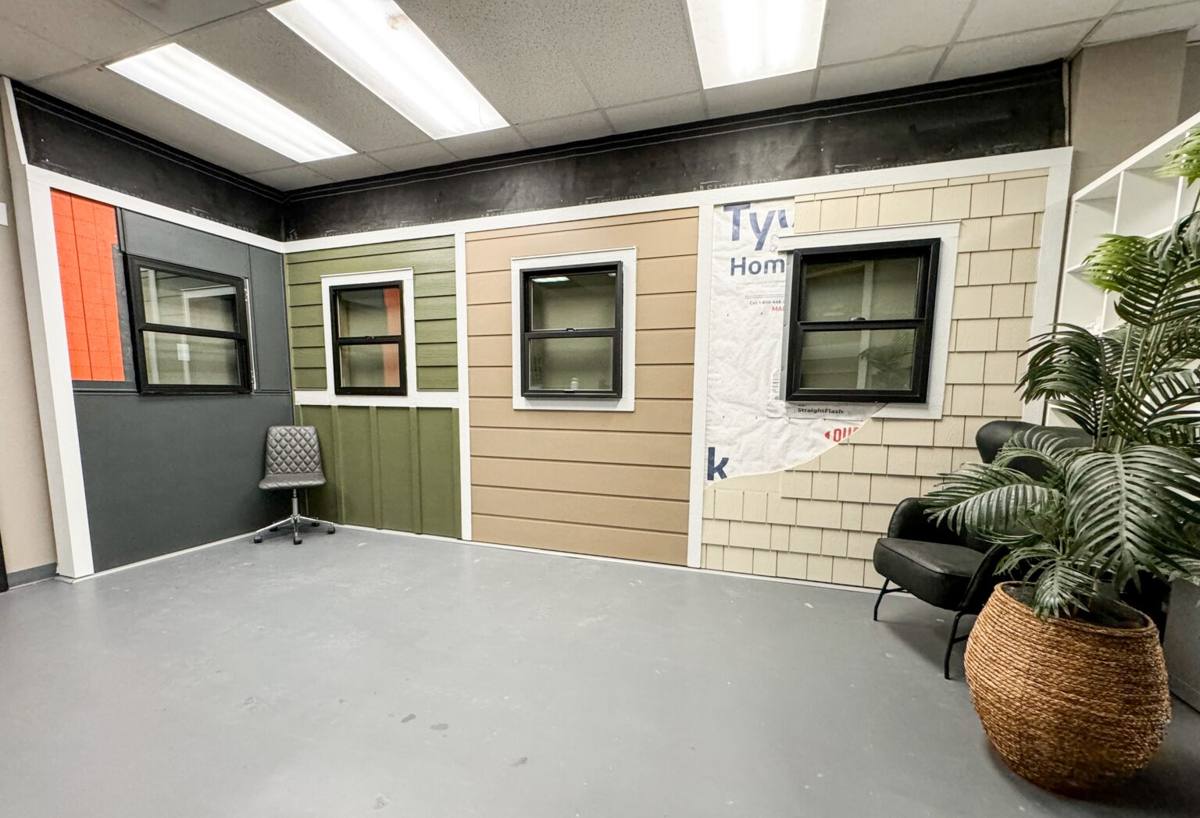
New-construction windows have a nailing fin that fastens directly to the wall sheathing before siding goes on. That's the whole point of using them at this stage instead of a retrofit or pocket window — you get full access to integrate the window with the water-resistive barrier (WRB), flashing, and framing in the correct shingle-lap order. Done correctly, water that gets past the siding has a continuous, gravity-fed path back out of the wall. Done poorly, that same water gets trapped behind the WRB where nobody sees it until there's a stain on drywall or soft sheathing years later.
This is also the stage where window selection, rough opening sizing, and flashing details have to agree with each other. A window that's a good product on paper can still fail if it's installed out of square, under-flashed at the head, or sealed with the wrong material against the wrong substrate.
What "Correct" Actually Means in Practice
- Rough openings sized and squared to the window manufacturer's tolerances, not "close enough"
- WRB (housewrap or building paper) properly lapped and integrated with the window flange, not just taped over it
- Sill pan flashing installed under every window, sloped to drain outward, before the window ever goes in
- Head flashing installed last, lapping over the WRB above the window so water sheds down and out
- Compatible sealants and tapes — mismatched chemistries between flashing tape, sealant, and housewrap can fail to bond or degrade each other over time
- Fasteners and shims set so the frame isn't racked or bowed, which affects both weather sealing and long-term operation
What Edison's Climate Asks of a Window Assembly
Salt Air and Corrosion
Proximity to Samish Bay and Padilla Bay means airborne salt is a real factor on hardware, fasteners, and metal flashing. Standard steel fasteners and lower-grade aluminum flashing can start showing corrosion well before the window itself is due for attention. We spec corrosion-resistant fasteners and flashing metals for coastal Skagit County jobs, and we pay attention to which window hardware finishes actually hold up near salt water versus which ones are rated for it on paper only.
Driving Rain and Wind Exposure
Edison's open, low-lying terrain means wind doesn't lose much speed before it hits a house. That translates to rain being driven sideways into wall assemblies far more than in a sheltered, tree-lined lot. Sill pan flashing and correct head flashing lap aren't optional extras here — they're the difference between a window that sheds wind-driven rain and one that lets it wick into the wall over time.
Moss, Moisture, and a Long Wet Season
Skagit County's wet season runs long, and moss doesn't just grow on roofs — it takes hold in any spot that stays damp, including window sills, trim, and cladding details around openings. A window assembly that traps moisture behind it, even a little, gives moss and rot organisms exactly the conditions they need. Detailing that keeps bulk water moving out and airflow moving through is the real defense, more than any product claim on a window's box.
Choosing Windows That Make Sense for This Site
There's no single "best" window brand or material for every new build — the right choice depends on your budget, the home's design, and how exposed the site is. What we won't do is install a product in a way that ignores its own moisture-management limits just to save an installation step. Below is how the common frame materials generally compare for a coastal Skagit County build.
| Frame Material | Coastal/Moisture Performance | Maintenance | Typical Fit |
|---|---|---|---|
| Vinyl | Good; won't corrode, handles moisture well when installed correctly | Low | Budget-conscious new builds, rentals, straightforward openings |
| Fiberglass | Very good; dimensionally stable in temperature and moisture swings | Low to moderate | Larger openings, higher-exposure walls, longer-term ownership |
| Wood-clad | Depends heavily on cladding integrity and installation quality; interior wood needs protection from any water intrusion | Higher | Design-driven builds where interior wood look is a priority |
| Aluminum | Conducts heat/cold and can corrode without proper coatings; less common for exposed coastal walls | Moderate | Specific architectural applications |
For most Edison-area new builds facing open exposure, we steer clients toward vinyl or fiberglass for the field of the house, and reserve wood-clad units for protected elevations where the installation detailing and roof overhangs genuinely limit water exposure. That's a judgment call based on the site, not a blanket rule — we'll walk your plans with you and explain the trade-offs for your specific elevations.
Our New-Construction Window Process
- Plan review and rough opening check — we confirm opening sizes against the window schedule before framing gets locked in, catching mismatches while they're still cheap to fix
- WRB and flashing sequencing — we coordinate with your builder or GC so housewrap, sill pans, and window installation happen in the correct order, not out of sequence to save a day
- Sill pan installation — every rough opening gets a sloped, drained sill pan before the window is set, regardless of what the window manufacturer's minimum instructions call for
- Window setting and shimming — units are set plumb, level, and square, then shimmed and fastened per manufacturer spec so the frame isn't stressed
- Head and jamb flashing — integrated in proper shingle-lap order with the WRB, so water always sheds outward and downward
- Sealant and air-sealing — exterior sealed for weather, interior air-sealed for energy performance, using compatible materials throughout
- Final check — operation, seals, and flashing lap verified before we sign off and siding crews move in behind us
Mistakes We Correct or Prevent on New Builds
Most window failures we get called out to inspect on newer homes trace back to a handful of repeated errors, and they're almost always installation issues rather than product defects:
- Skipped or improvised sill pan flashing, relying on sealant alone to keep water out
- WRB cut and taped around the window instead of properly lapped, leaving a seam for water to find
- Fasteners driven through the frame in a way that racks it slightly out of square, affecting long-term seal and operation
- Incompatible sealant and tape chemistries that don't bond or that break down faster than the building's design life
- Head flashing left out entirely on "budget" installs, which is one of the most consequential corners to cut
On a new build, every one of these is a low-cost fix during framing and an expensive, invasive fix once siding and interior finishes are on.
What Affects Cost on a New-Construction Window Job
| Factor | Why It Matters |
|---|---|
| Number and size of openings | More openings and larger units mean more material and labor hours |
| Frame material and glass package | Fiberglass and upgraded low-E/argon glass packages cost more than base vinyl |
| Wall exposure and elevation | Higher-exposure walls facing prevailing wind and rain often warrant extra flashing detail or a more moisture-tolerant frame |
| Coordination with your builder's schedule | Working cleanly within a GC's framing-to-siding timeline avoids delay costs on both sides |
| Site access | Rural Edison lots with limited staging space can add setup time compared to an in-town lot |
We're glad to walk your plan set and give you real numbers rather than a rule-of-thumb estimate — every new build's window schedule is different.
A Checklist Before You Finalize Your Window Order
- Confirm rough openings on the plans match actual window unit dimensions, not just nominal sizes
- Ask your window supplier or installer what sill pan and flashing method they use — "we caulk it well" is not a flashing plan
- Check that your chosen frame material fits your home's actual sun and wind exposure, not just its look
- Confirm who is responsible for WRB integration — window installer, framer, or siding crew — so nothing falls through the coordination gap
- Ask about warranty coverage for both the product and the installation labor, since most window failures are installation-related
Why It Helps to Hire a Crew That Already Works Edison
Edison is a small enough area that there's no substitute for having actually installed windows in its specific conditions — the wind exposure off the bay, the diked farmland's flat terrain, and how quickly moss and moisture problems show up if flashing details are skipped. We work throughout Skagit County and Fidalgo Island, and Edison-area new builds get the same sill-pan-every-time, properly-lapped-flashing approach we use everywhere else. We're not guessing at what this climate needs — we've been dealing with it on real jobs, season after season.
If you're framing a new home or addition in Edison and want your windows installed by a crew that treats flashing and sequencing as non-negotiable, we'd be glad to take a look at your plans. Reach out for a free, no-pressure estimate using the form below.