 Anacortes Siding
 Building New in Flounder Bay? The Windows Are Where Water Problems Start
Flounder Bay sits close to the water on Fidalgo Island, and that proximity is exactly what makes new-construction window installation here different from a standard job. Homes going up in this part of Anacortes take wind-driven rain off the bay, carry a steady load of salt in the air, and sit under enough cloud cover and shade in the wetter months to grow moss on anything that stays damp too long. None of that is a problem you fix later with caulk. It's a problem you solve during framing, before siding ever goes up, by getting the window opening built correctly the first time.
New-construction window work is a different trade than replacement window work, even though both involve setting glass in a wall. On a new build, we're not working around existing siding and trim — we're integrating the window into the wall assembly itself, which means the flashing, the water-resistive barrier, and the window all have to be sequenced correctly or the whole envelope is compromised before the house is finished.
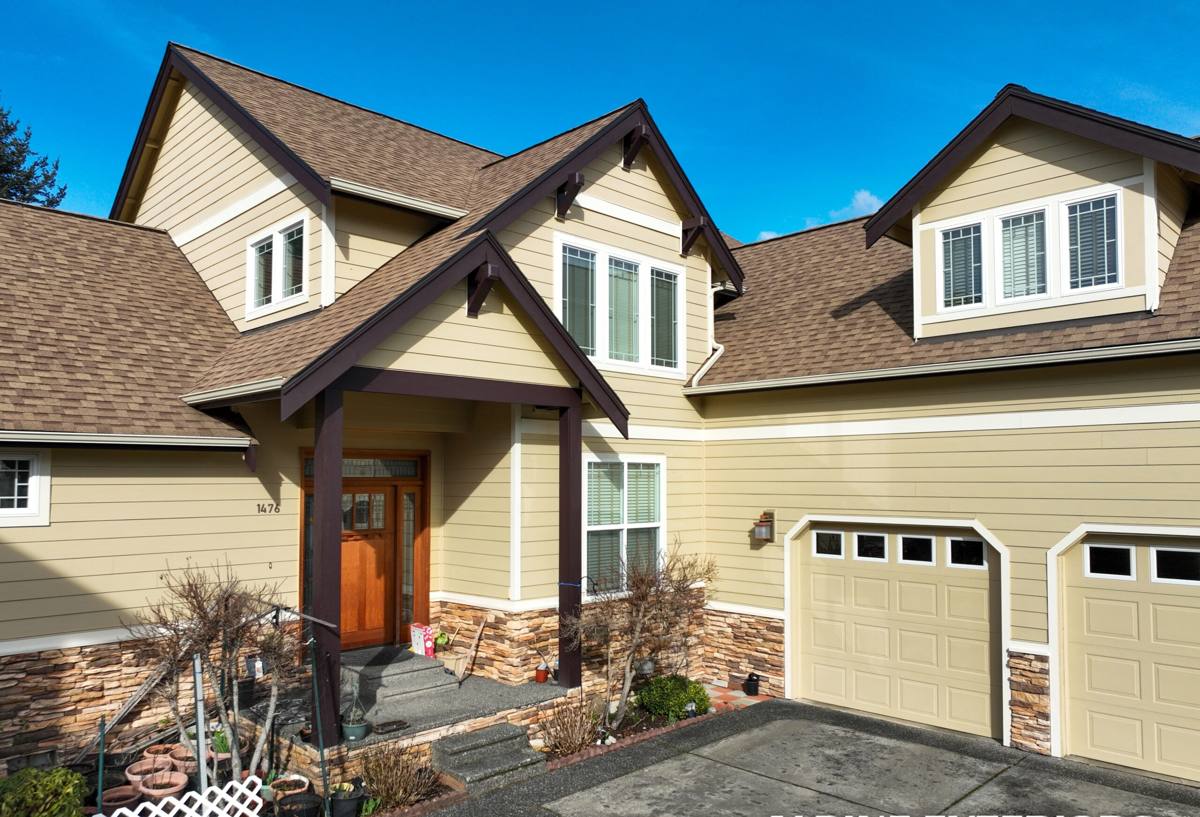
What Flounder Bay's Climate Actually Demands
Skagit County's marine climate is mild, which lulls people into thinking window installation here is low-stakes. It isn't. Three conditions specific to a waterfront-adjacent site like Flounder Bay drive how we approach every opening:
Salt Air
Airborne salt accelerates corrosion on fasteners, hardware, and unprotected metal flashing. It also degrades certain sealants faster than inland use would suggest, and it can attack lower-grade aluminum components over time. We choose fasteners, flashing metals, and hardware finishes with that exposure in mind rather than defaulting to whatever ships standard with a window package.
Driving Rain
Wind off the bay doesn't just drop rain on a wall, it pushes it sideways and up under laps, sills, and trim. A window that would perform fine on a sheltered inland lot can leak on a Flounder Bay elevation that faces the water, if the flashing details don't account for wind-driven water intrusion. This is the single biggest reason we don't treat window installation as a generic checklist — the flashing sequence has to match the exposure.
Long Moss Season
Shaded, north-facing, and water-facing walls in this area stay damp longer through fall, winter, and spring. Anywhere water can pool or linger — a sill that doesn't shed properly, a horizontal trim board without drainage — becomes a place moss and mildew take hold. Correct sill pitch and drainage at the window opening isn't cosmetic; it's what keeps that section of wall dry enough that organic growth doesn't get a foothold.
New Construction vs. Replacement: Why the Method Matters
On a replacement job, the window goes into an opening that already has siding and trim around it, and the work is largely about matching the existing installation while upgrading the unit itself. New-construction installation is a ground-up assembly:
- The rough opening is built to the window manufacturer's specified tolerances, not "close enough."
- A sill pan is installed to catch and direct any water that gets past the window back outside the wall — this is the detail most often skipped on rushed builds, and it's the one that prevents rot at the sill years later.
- The water-resistive barrier (house wrap) is integrated with the window flashing in the correct shingle-lap order, so water draining down the wall is always directed over the layer below it, never behind it.
- Flashing tape and flexible flashing at the jambs and head are lapped to shed water outward, with the head flashing last so it laps over everything beneath it.
- The window itself is set plumb, level, and square, then fastened per the manufacturer's schedule — not "however many screws looked right."
Skip or shortcut any one of those steps and the window can look correctly installed for years before a leak shows up inside the wall cavity, usually as rot or mold long before it's visible from inside the house.
The Flashing Sequence, Explained
This is the part of the job that determines whether a window performs for decades or becomes a slow leak. The order is not negotiable, and it's the same reason we walk every opening before siding goes on:
- Sill pan first. A sloped, sealed pan under the window opening so any water that reaches the sill drains back out, not into the wall.
- Jamb flashing next. Vertical flashing at both sides, lapped over the sill pan's edges.
- Window installed and fastened per the manufacturer's nailing or screw schedule, with shims as needed to keep the frame square and prevent operational hardware from binding.
- Head flashing last, lapped over the top of the window flange and integrated with the WRB above it, so water draining down the wall face always runs over the flashing, never behind it.
- WRB integration tied into the whole assembly in shingle-style laps, sealed at penetrations, before siding goes over the top.
On a bay-facing wall in particular, we pay close attention to head flashing extension and end-dam detailing, since that's where wind-driven rain is most likely to find a gap that a calmer inland site would never expose.
Choosing the Right Frame Material for This Exposure
There's no single "best" window material for every project — the right choice depends on budget, the home's design, and how much maintenance the owner wants to take on. For a salt-air, high-moisture site like Flounder Bay, here's how the common options actually compare:
| Frame Material | Salt Air Behavior | Moisture Behavior | Maintenance |
|---|---|---|---|
| Vinyl | Does not corrode; UV-stable finishes hold up well | Won't rot; dimensionally stable in damp conditions | Low — occasional cleaning |
| Fiberglass | Excellent — inert to salt exposure | Excellent; very stable across temperature and moisture swings | Low |
| Wood-clad (exterior clad) | Cladding protects the exterior face; exposed wood elsewhere is vulnerable | Good if the cladding and seals stay intact; failure points show up at joints | Moderate — watch cladding seams and interior wood finish |
| Aluminum (uncoated/lower-grade) | Susceptible to corrosion and pitting near saltwater | Conducts heat/cold, prone to condensation | Higher — needs quality coatings and regular inspection |
We don't push one brand or material on every job. What we do insist on is being honest about trade-offs: a lower-grade aluminum window might fit a tight budget, but on a water-facing lot in Flounder Bay it's going to show corrosion and condensation issues years before a vinyl or fiberglass unit of similar quality would. That's a maintenance and longevity conversation we'd rather have up front than after the siding is closed in.
How We Handle New-Construction Window Installs
Whether we're working directly with a homeowner building new or as the window-and-siding sub on a builder's crew, the process is consistent:
- Plan review. We look at window schedules and elevations before framing is finalized, catching rough-opening sizing issues while they're still cheap to fix.
- Opening inspection. Every rough opening is checked for square, level, and correct dimension before flashing starts.
- Sill pan and flashing installed in the sequence above, with extra attention to any elevation facing the bay or prevailing wind.
- Window set and fastened to manufacturer spec, then operated and checked for smooth function before we move on.
- WRB tie-in and final flashing completed and photographed for our own records before siding closes the wall.
- Walkthrough with the homeowner or builder, so everyone can see the flashing details before they're covered.
What Goes Wrong When This Is Rushed
Most of the window-related callbacks we see in this area don't come from a bad window — they come from an installation that skipped a step to save time. The pattern is familiar: no sill pan, flashing lapped backward so water runs behind it instead of over it, or fasteners driven through the flange without hitting solid framing. On an inland, sheltered lot, some of these shortcuts might not surface for years. On a Flounder Bay elevation exposed to driving rain off the water, they tend to show up fast — as staining, soft trim, or a musty smell inside a wall that should have stayed dry.
A crew that's done this work elsewhere on the island but not specifically in an exposed waterfront setting can still get it wrong, not from lack of skill but from not adjusting the flashing details for the exposure. That local pattern recognition — knowing which elevations in Flounder Bay need extra attention — only comes from having installed windows on homes in this specific setting before.
Before You Sign Off on Any New-Construction Window Job
- Ask whether a sill pan is included in the installation, not assumed.
- Confirm the flashing sequence — sill pan, jambs, window, then head flashing last.
- Ask which frame material is proposed and why, given the site's exposure to salt air and wind-driven rain.
- Request to see (or photograph) the flashing before siding covers it.
- Confirm fastener and hardware specs account for coastal/salt-air exposure.
- Ask how sill drainage and pitch are handled to prevent standing water and moss growth.
Why Local Experience on This Specific Site Type Matters
Anacortes and the wider Skagit County coastline aren't uniform. A protected, tree-shaded lot a few miles inland handles differently than an exposed, water-facing site in Flounder Bay. Getting new-construction windows right here means treating every opening's flashing and material choices as a response to that specific exposure — not applying a generic install method and hoping it holds up. That's the difference between windows that perform quietly for decades and ones that need attention within a few years of the home being finished.
If you're building new in Flounder Bay and want the window openings done right the first time — correctly flashed, properly integrated with the wall assembly, and matched to a frame material that can handle salt air and driving rain — we're happy to walk the plans with you. Reach out for a free, no-pressure estimate through the form below.