 Anacortes Siding
 Mount Vernon homes sit in a part of Skagit County where the weather doesn't take much of a break. Salt-laden air drifts in off the Sound, storm systems push rain sideways into walls for months at a stretch, and shaded, damp lots keep moss growing long after other parts of the state have dried out for the season. A siding installation done for this specific area has to account for all three, not just check the box on materials and move on. This page is about what that actually means when we're the crew doing the work.
What Mount Vernon's Climate Demands From a Siding Installation
Three conditions shape how siding performs here: salt air, driving rain, and a moss season that runs longer than in drier inland areas. None of them are dramatic in isolation, but installation quality determines whether they stay cosmetic annoyances or turn into real problems.
Salt air accelerates corrosion on fasteners and metal flashing, which is why fastener choice and flashing detail matter more here than they would somewhere landlocked. Driving rain doesn't fall straight down — it gets pushed by wind into every unsealed joint, every under-lapped seam, and every gap where two trades didn't coordinate their work. And moss, which favors the shaded, damp conditions common on north-facing walls and tree-covered lots around Mount Vernon, holds moisture against a wall surface long after a storm passes, extending the time any weak point in the installation stays wet.
Why Generic Installation Standards Fall Short
A lot of installation guidance is written for a national average climate — moderate rain, moderate humidity, a real dry season to let things recover. Mount Vernon doesn't get much of that recovery window. The gap between "installed to a generic standard" and "installed correctly for this valley" is where premature siding failure usually starts, and it's rarely the siding material itself that's at fault. It's flashing, fastening, and joint treatment that didn't account for how wet and how long this area actually stays wet.
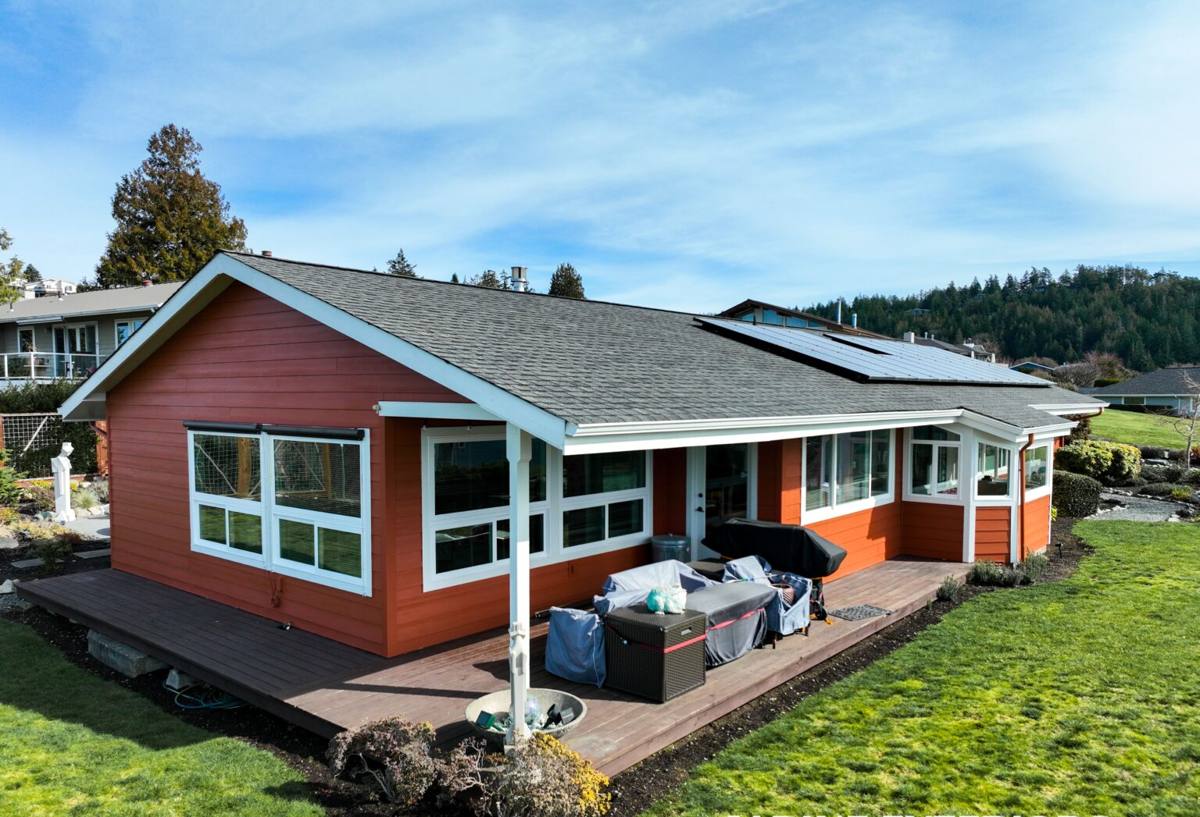
Why We Install Only James Hardie Fiber Cement
We install one siding product on every job: James Hardie fiber cement. We don't install vinyl, LP SmartSide, Cemplank, Allura, primed spruce, or cedar, and that's a deliberate standard, not a lack of options. Each of those products has genuine strengths — vinyl is inexpensive, engineered wood installs quickly and takes paint well, cedar has real character — but each one also carries a trade-off that matters more in a climate like this than it might elsewhere.
Vinyl expands, contracts, and can become brittle over time, and its interlocking seams give wind-driven rain a path in if installation isn't precise. Wood-based products depend on an organic core staying dry, which means every field cut has to be primed and sealed correctly, every time, for the life of the siding — a hard standard to hold across a full crew on every job. Cedar is a real, attractive material, but it asks for ongoing refinishing and moss control to keep performing through a valley climate that doesn't offer much of a dry stretch to recover in.
Fiber cement sidesteps the core issue: it isn't organic. There's no wood substrate for trapped moisture to work into, and it doesn't feed moss and mildew growth the way wood-based siding can. James Hardie also builds its HZ product lines around the kind of sustained coastal moisture Skagit County deals with, rather than a single formulation sold everywhere in the country. The factory-applied ColorPlus finish is baked on under controlled conditions instead of painted on-site, which matters in an area where field-painting has a short dry window to work with.
What Correct Installation Actually Involves
Installation quality is what separates siding that performs for decades from siding that starts showing problems in a few years — regardless of which product is on the wall. For a Mount Vernon home, that means a specific set of details done right, every time.
- Weather-resistant barrier installed and lapped correctly behind the siding, with no gaps at penetrations
- Flashing integrated at every window, door, and roofline transition — not caulked over as an afterthought
- Starter strip set with proper clearance from grade, decks, and patios to keep the bottom edge out of standing water
- Fastener type, pattern, and spacing matched to the specific Hardie product and this area's wind and moisture exposure
- Joint and seam treatment adjusted for sun-exposed walls versus shaded, moss-prone faces
- Factory-finished color matched cleanly at trim, corners, and touch-up points
Skip any one of these and you've built in a weak point. It may not show up as a leak or a stain in the first year or two, but it will eventually — usually as a callback nobody wants to make.
Flashing: The Detail That Decides Everything Else
If there's one part of a siding installation that determines long-term performance in this climate, it's flashing. Wind-driven rain finds gaps that gravity-only design assumptions miss, which is why every window, door, and roof-to-wall transition needs flashing that's actually integrated into the water-resistant barrier — layered so water sheds outward at every level, not just caulked at the surface. Caulk is a maintenance item that degrades; correctly lapped flashing is a permanent detail that doesn't depend on a homeowner remembering to recaulk it every few years.
Our Installation Process, Step by Step
We walk every Mount Vernon project through the same sequence, because skipping steps is how corners get cut on jobs that look fine on installation day and fail years later.
- On-site assessment — we look at existing siding condition, wall orientation, moisture history, and any signs of prior water intrusion before quoting anything.
- Tear-off and substrate check — removing old siding lets us inspect sheathing for hidden rot or damage before it gets covered up again.
- Weather-resistant barrier and flashing — installed and lapped correctly at every penetration before a single piece of siding goes up.
- Hardie panel or plank installation — fastened to manufacturer spec, with joint treatment matched to each wall's actual sun and shade exposure.
- Trim, corners, and color matching — finished with factory ColorPlus product so touch-up points don't stand out.
- Final walkthrough — we go over the finished work with you and explain what maintenance, if any, to expect going forward.
Where Installations Commonly Go Wrong
Most premature siding problems we get called out to inspect trace back to a small number of recurring installation mistakes, not to a bad batch of material. Knowing what separates a correct approach from a shortcut helps you evaluate any quote you're comparing.
| Installation Detail | Done Correctly | Common Shortcut |
|---|---|---|
| Flashing at openings | Integrated and lapped with the weather barrier | Caulked over gaps instead of properly flashed |
| Clearance from grade | Proper gap maintained at bottom edge | Siding installed too close to soil, decks, or patios |
| Fastening | Matched to product spec and local wind exposure | Generic fastener pattern applied regardless of siding line |
| Joint treatment | Adjusted for sun versus shaded, moss-prone walls | Same treatment applied to every wall face |
| Cut-edge sealing | Sealed per manufacturer instruction at every cut | Left unsealed or inconsistently treated |
Cost Factors for a Mount Vernon Siding Installation
Every home is different, so we won't quote a number without seeing the property, but the factors that actually move the price on a Mount Vernon job are consistent.
| Factor | Why It Matters |
|---|---|
| Home size and wall complexity | More square footage and more corners, gables, and transitions mean more material and labor |
| Existing siding removal | Tear-off and disposal of old material adds time versus installing over new construction sheathing |
| Substrate condition | Rot or moisture damage found during tear-off needs repair before new siding goes on |
| Hardie product line selected | Panel size, plank exposure, and finish options carry different material costs |
| Trim and detail work | Custom trim, corner treatments, and color-matching add labor time |
| Access and site conditions | Steep lots, tight setbacks, or limited equipment access can affect labor time |
Why Hiring a Crew That Already Works in Mount Vernon Matters
A crew that installs siding regularly in this area already knows which walls tend to hold moss, which lots see the harshest wind-driven rain, and how much clearance actually holds up against a wet Skagit County winter. That's not something you can pick up from a manufacturer's install manual alone — it comes from repeated exposure to this specific climate on real jobs. When you're comparing contractors, it's worth asking directly about their experience installing fiber cement siding specifically in Skagit County conditions, not just their general service area.
What to Look For in a Contractor
- Manufacturer training or certification on the Hardie product line being installed
- A clear, specific explanation of how flashing will be handled at every opening and transition
- Verifiable licensing, bonding, and insurance
- A written scope of work you can read and understand before signing anything
- Willingness to explain, in plain terms, why they recommend one product over another for your home
Timeline and What to Expect During the Project
Most single-family siding installations in this area take one to two weeks from tear-off to final trim, depending on home size, existing condition, and how much the wet season is cooperating that week. Weather windows matter for scheduling weather-barrier and flashing work specifically, since that step needs to go on under reasonably dry conditions to install correctly. A contractor should walk you through a realistic timeline for your specific project rather than giving a generic estimate that doesn't account for Skagit County's actual weather patterns.
If you're considering a siding installation for your Mount Vernon home, we're glad to take a look and give you a straightforward assessment — what your walls actually need, what it involves, and what to expect. Reach out for a free, no-pressure estimate and we'll walk the property with you.
```